A curtain rod can look perfectly placed above the window while the curtains themselves finish several inches above the floor. That usually means the rod was positioned before the panel and its hardware were measured together. Start with the drop you can actually achieve, then decide how that height relates to the window, ceiling and crown molding.
Choose the reference point before doing the arithmetic
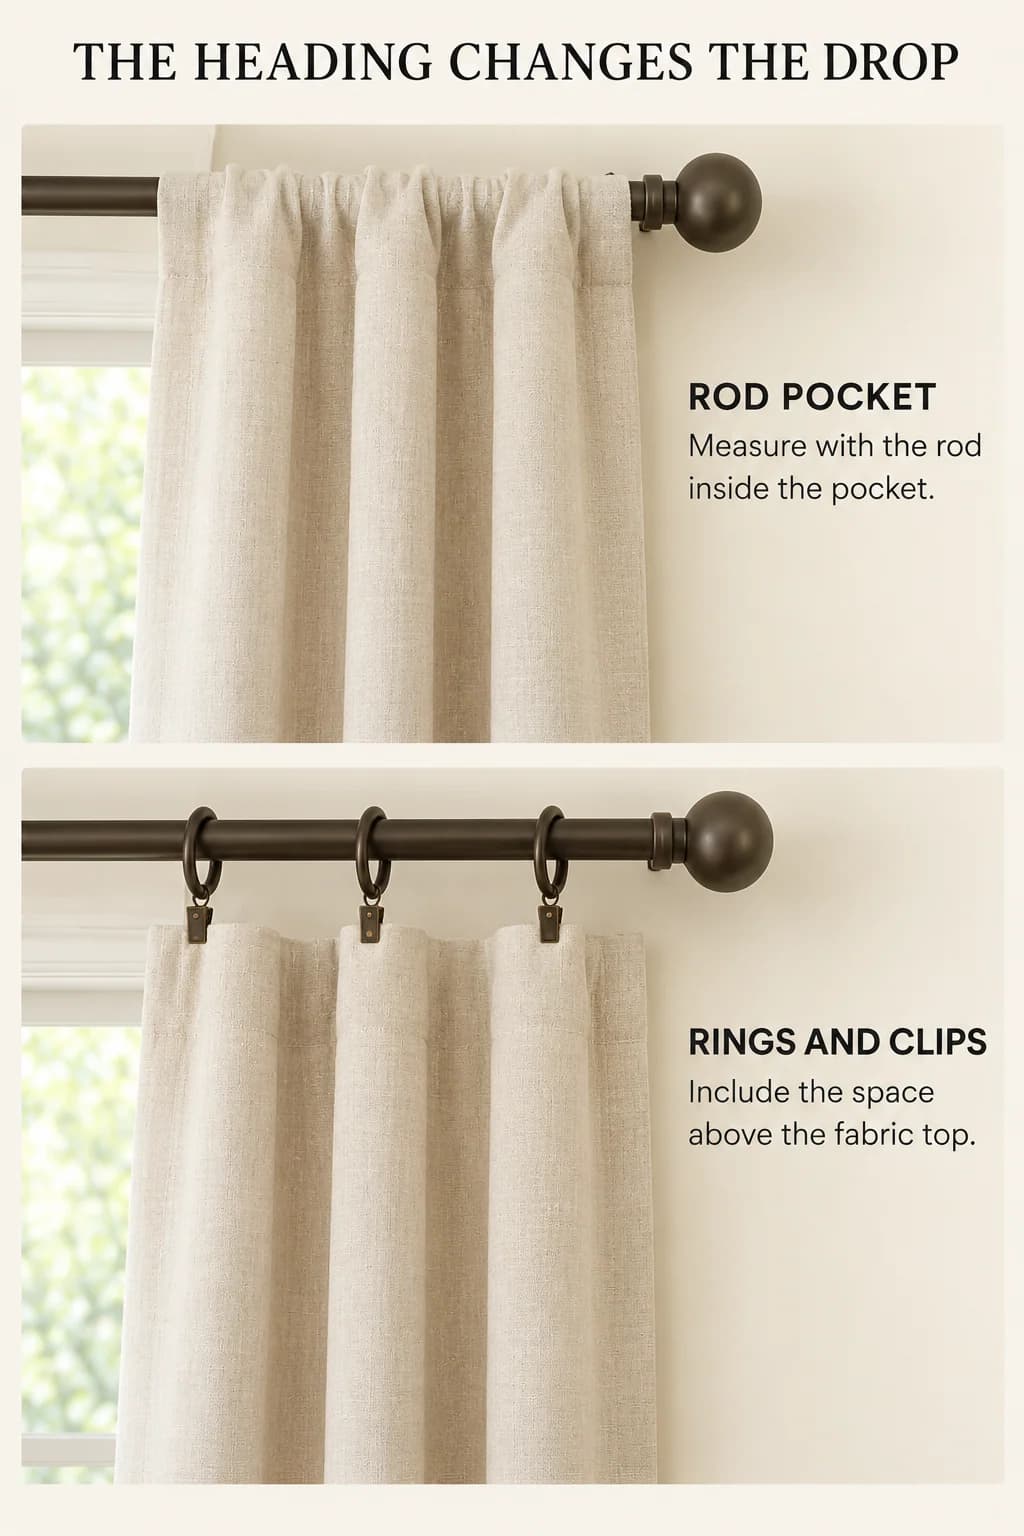
For a panel hanging from separate rings, use the top of the rod as your reference. Assemble a ring and its clip or hook on the actual rod. Measure the vertical distance from the rod top to the fabric top, then measure from that fabric top to the finished hem. Add those two distances to find the complete hanging drop. A ring’s advertised diameter is not necessarily the drop: clips, hooks and the way the ring rests all change it.
The calculation for a curtain that clears the floor is:
Rod-top height = measured fabric length + measured hardware drop + desired floor clearance.
If you measure directly from the rod top to the hem of an assembled sample, the hardware is already included. Do not add it again. For a rod pocket or grommet heading, take that direct measurement with the rod inserted; the fabric may extend above the rod, so the panel’s package length is an unreliable substitute.
Use the curtain-measuring guide for width and fullness as well. Height alone cannot tell you whether the opened panels will clear the glass.
An eight-foot room with panels you already own
Here is an illustrative installation, in inches. The ceiling is 96 inches above the floor, the window trim reaches 80 inches, and a measured panel is 84 inches from fabric top to hem. The assembled ring and clip put the fabric top 2 inches below the rod top. You want the hem to clear the floor by half an inch because you open the curtains every morning.
The rod top belongs at 84 + 2 + 0.5 = 86.5 inches above the floor. It sits 6.5 inches above the trim and 9.5 inches below the ceiling. That gives you a plausible position to mock up; it is not a rule that every eight-foot room needs a rod at this height.
Now translate the rod reference into the bracket’s mounting points. Suppose the actual bracket template shows its upper screw center 1 inch below the rod top when the rod sits in its cradle. That upper screw mark is 85.5 inches above the floor. Mark the other holes from the bracket template, not from a guessed spacing. Your bracket may have a different offset or mounting arrangement.
Hold a panel at the proposed position before drilling. If its actual hem misses your calculation, remeasure the sample, including the clip placement. Do not compensate for a measuring mistake by arbitrarily moving one bracket. Establish a level rod line and then confirm where the fabric ends at both sides.
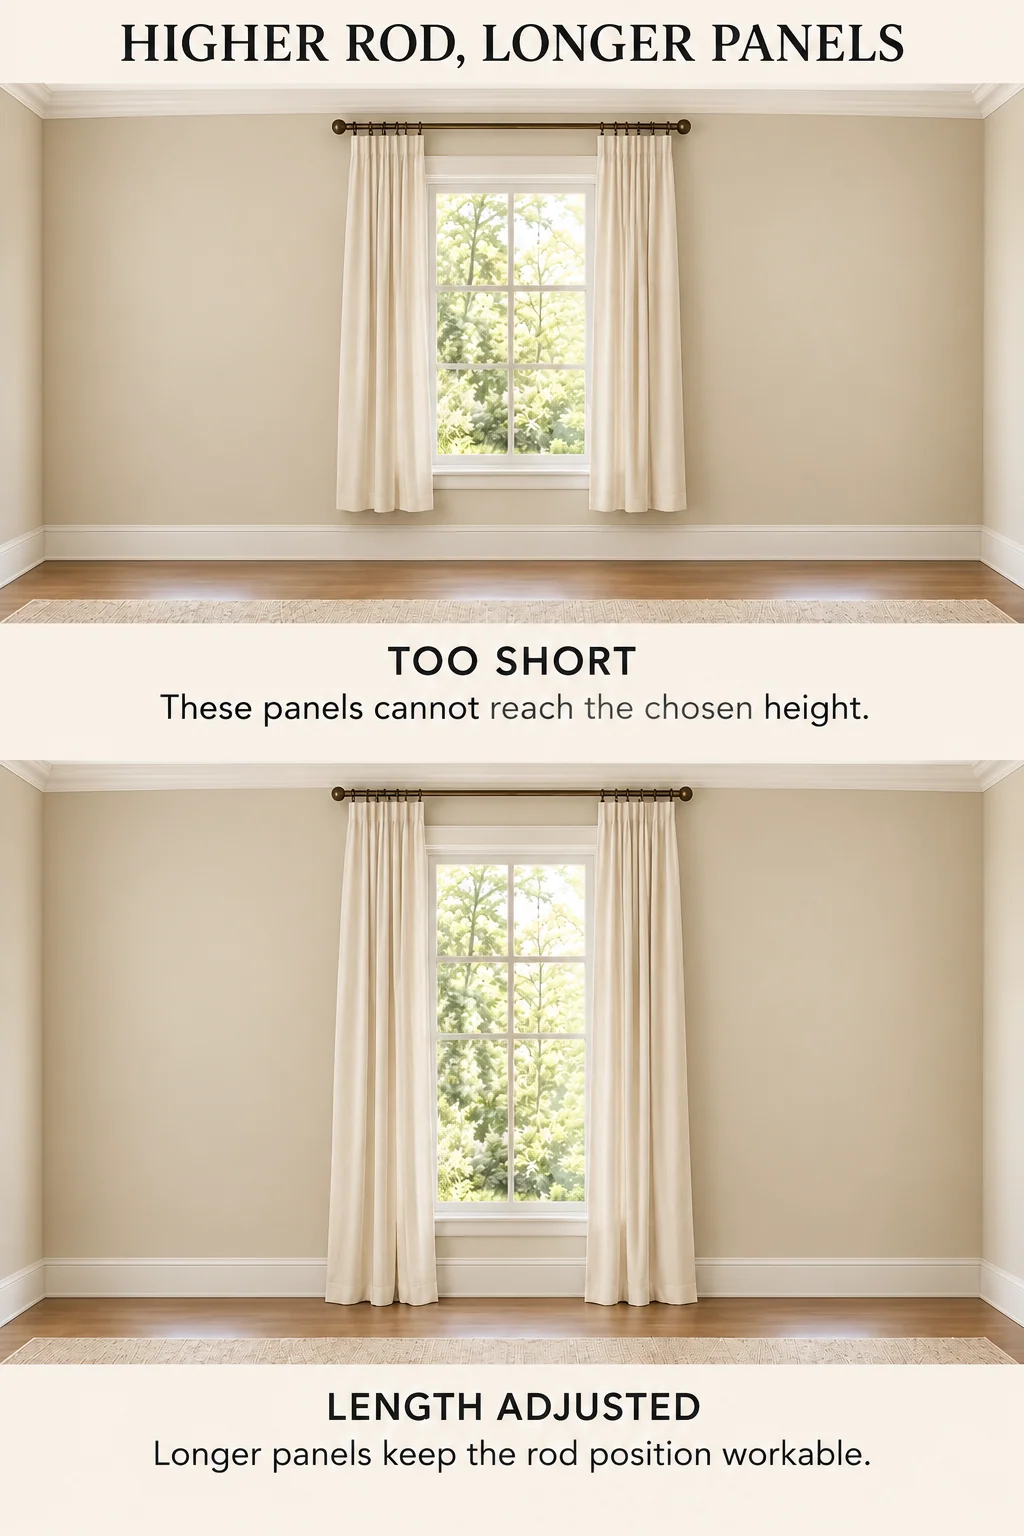
What if you wanted the rod higher?
At a rod-top height of 92 inches, those same panels would finish 92 − 2 − 84 = 6 inches above the floor. To keep the half-inch clearance at that height, the fabric would need to measure 92 − 2 − 0.5 = 89.5 inches. Choose a sufficiently long panel and hem it to the measured length, or keep the lower rod position. Larger rings are not a sensible fix for a several-inch shortage unless their actual proportions, compatibility and measured drop suit the installation.
A taller room with crown molding
Consider a second illustrative room: a 120-inch ceiling, crown molding whose lower edge is at 114 inches, and window trim at 96 inches. You mock up the rod top at 109 inches. This leaves 5 inches to the bottom of the crown and places the rod 13 inches above the window trim. The rod, finials and bracket must all fit within that space; checking only the pole’s diameter misses the rest of the assembly.
With the same measured 2-inch hardware drop and half-inch floor clearance, the needed fabric length is 109 − 2 − 0.5 = 106.5 inches. A panel that actually measures 108 inches can be shortened by 1.5 inches. A panel that measures 96 inches would leave its hem 11 inches above the floor at this rod position. It cannot produce the intended result without a substantial length change or a lower rod.
If this bracket’s upper screw center is 1.25 inches below the rod top, its first mark is 107.75 inches above the floor. Again, that offset is an example taken from an assumed bracket, not an installation specification to copy.
High ceilings do not require the rod to follow them all the way up. A rod close to a very tall ceiling may make an ordinary window look stranded below it. Compare a position related to the trim with one nearer the crown, using the whole wall as your reference. In a low room with little space above the trim, the hardware may determine the only workable height. A manufacturer-approved ceiling track is a different installation, with its own measurements and fixings.
Make the mock-up behave like the finished curtain
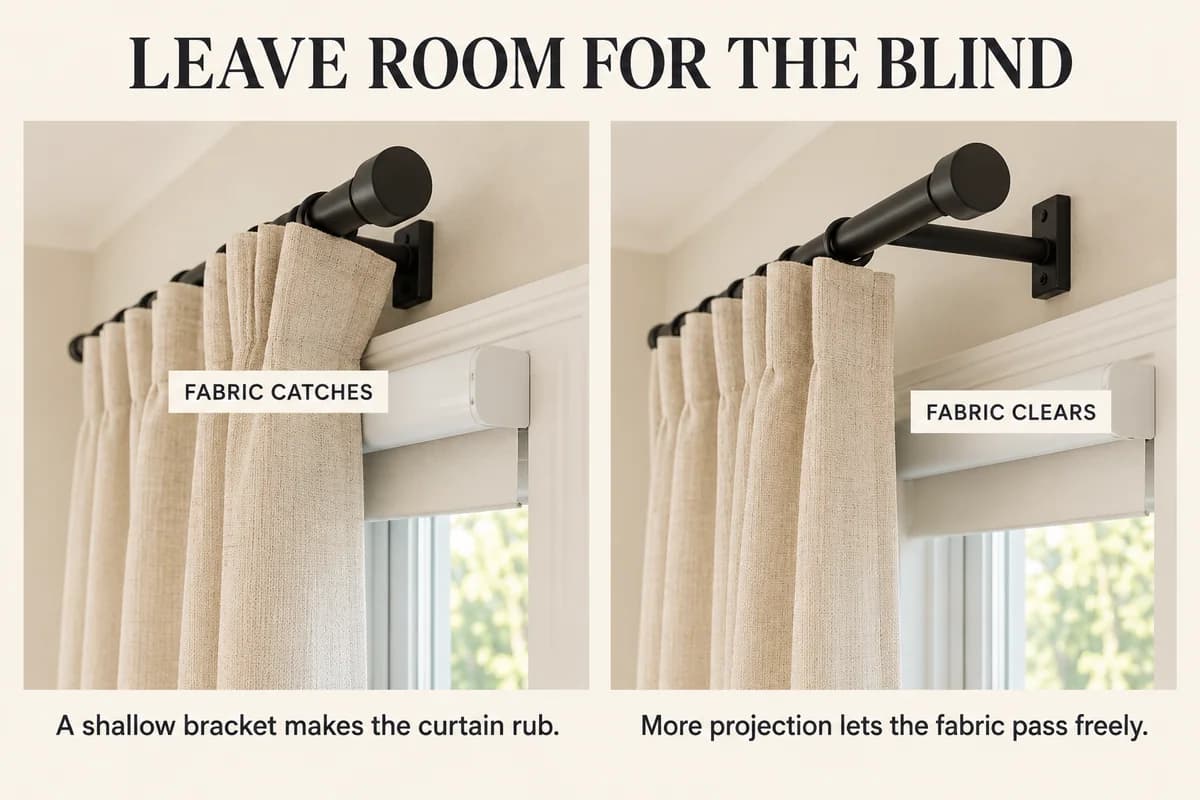
Tape the intended bracket outline and outer panel edges on the wall using tape suitable for the finish. Check that finials miss an adjacent wall and that the window handle can move. If blinds sit underneath, the rod needs enough projection for the fabric to pass in front of their headrail without rubbing. Our guide to layering curtains and blinds explains that separate depth decision.
Use a supported sample panel to inspect the hem across the full opening. On an uneven floor, a level rod can leave different gaps at the two ends. Base the minimum clearance on the highest part of the floor and consider individual hemming if the difference bothers you. Tilting the rod to disguise the floor usually transfers the problem to the visible top line.
A slight floor clearance suits curtains that move frequently. Fabric deliberately resting on the floor is a different finish, with more material to clean and move around. Neither choice overrides heater, radiator or other appliance clearances. Follow the equipment’s instructions; a shade or intentionally shorter treatment may be more appropriate than floor-length curtains beside heat.
Finally, use the hardware maker’s requirements for supports, wall substrate, fasteners and panel weight. The calculated height tells you where the assembly would sit. It does not establish that the wall or a particular fixing can carry it. Once both the mounting and the full drop work, the distance above the trim becomes the result of a sound installation rather than an isolated decorating rule.