The cabinet opening is a rectangle. The space behind it rarely is. A drain, disposal, hose or projecting hinge can divide the interior into several useful pockets, none of which matches the cabinet's advertised width.
Empty the cabinet before choosing an organizer
Take everything out and check the base and pipe connections for dampness. A liner or a new bin should not conceal an unresolved leak. Deal with the source of moisture before arranging storage, then clean and dry the cabinet as appropriate for its materials.
Photograph the empty interior and mark the drain, water lines, shutoff valves, disposal and hinges. Leave plumbing connections and shutoff access available; do not hang storage from pipes or hoses. Where equipment has installation or service clearances, follow those instructions rather than treating every visible gap as spare capacity.
Measure each clear pocket separately: width, depth and height. Also measure the narrowest opening a loaded bin must pass through, including the hinge. Outside container dimensions matter, including rims, handles and rails. A bin's listed capacity tells you little about whether a tall spray trigger will clear a pipe during removal.
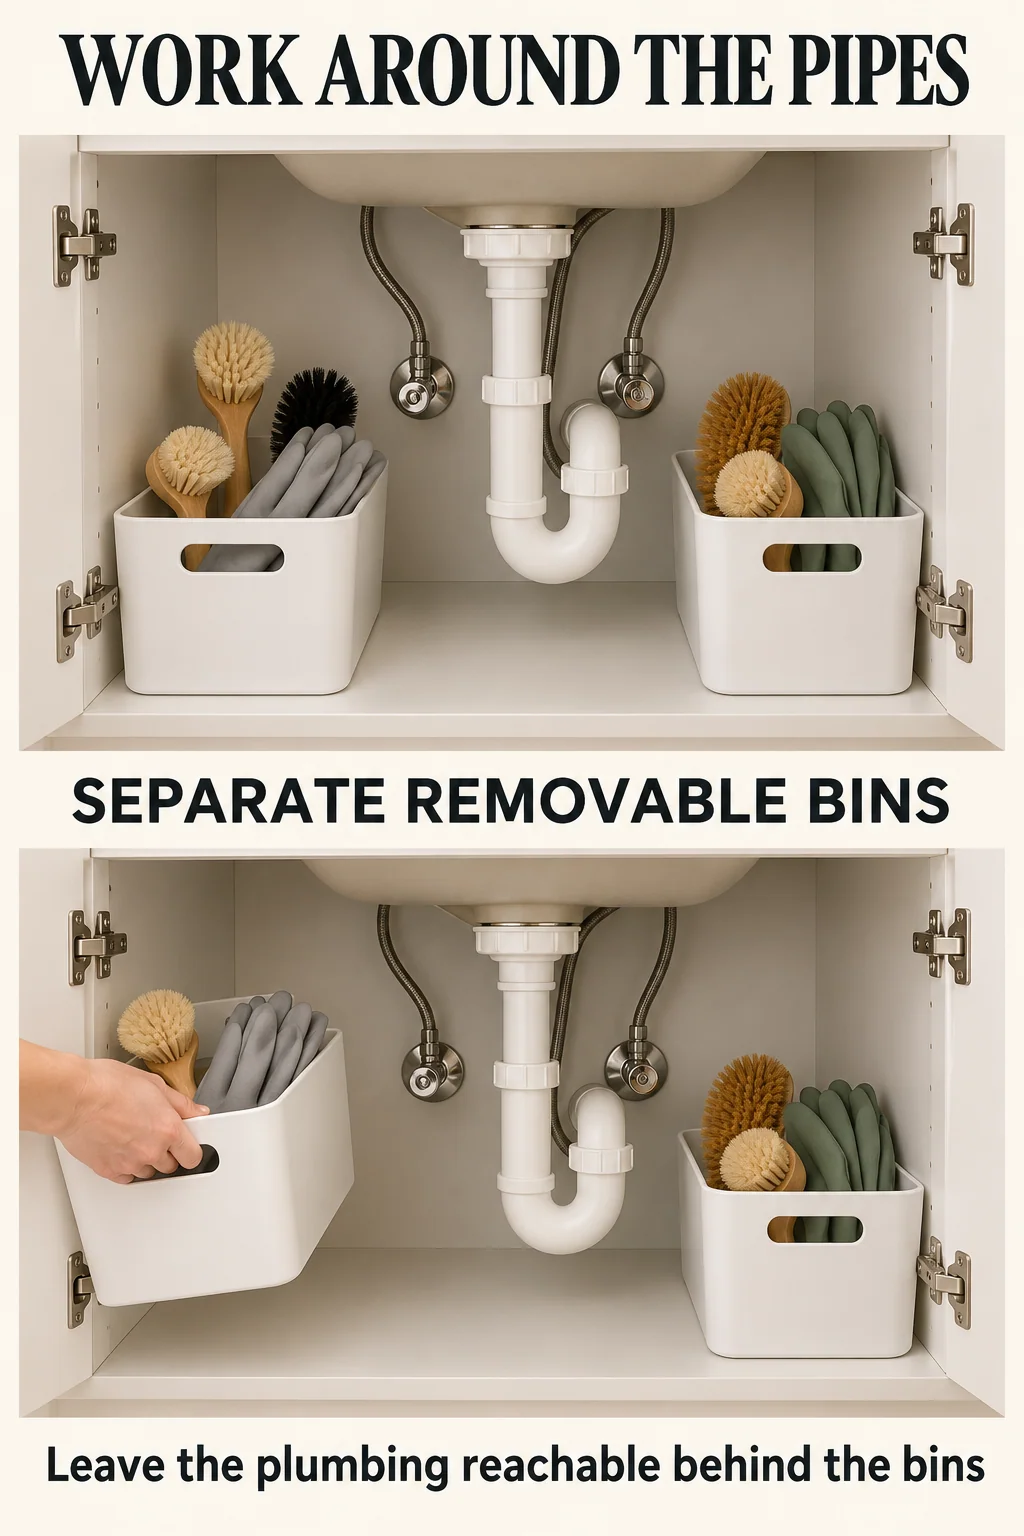
Layout one: two removable bins beside a central drain
In this illustrative cabinet, a central drain leaves a left pocket 12 inches wide, 18 inches deep and 14 inches high. The right pocket is 10 inches wide, 18 inches deep and 20 inches high. The route in front of the drain and the rear valve access remain clear. The door openings, after allowing for hinges, are 11 inches on the left and 9 inches on the right.
Choose a left bin with outside dimensions of 10 by 15 by 6 inches and a right bin of 8 by 15 by 6 inches. The left holds dry brushes, gloves and spare sponges. The right holds only everyday bottles whose labels permit this storage, upright in their original containers. Suppose their maximum loaded height is 12 inches, including triggers, and the bin handles stay below that. Both bins fit their measured pockets and the openings through which they must be removed.
The extra depth behind a bin is not an invitation to wedge another bottle behind it. Keep the intended service access clear and check that no handle catches a pipe when lifted. Bring each loaded bin straight out through its opening. If the left bin has to tilt sharply to pass the hinge, use a narrower one rather than treating the cabinet's 12-inch interior width as the deciding measurement.
This two-bin layout is preferable to a full-width organizer here because either group can come out without dismantling the other. It also exposes the cabinet base for inspection. A small empty area around the drain has a useful job even when it stores nothing.
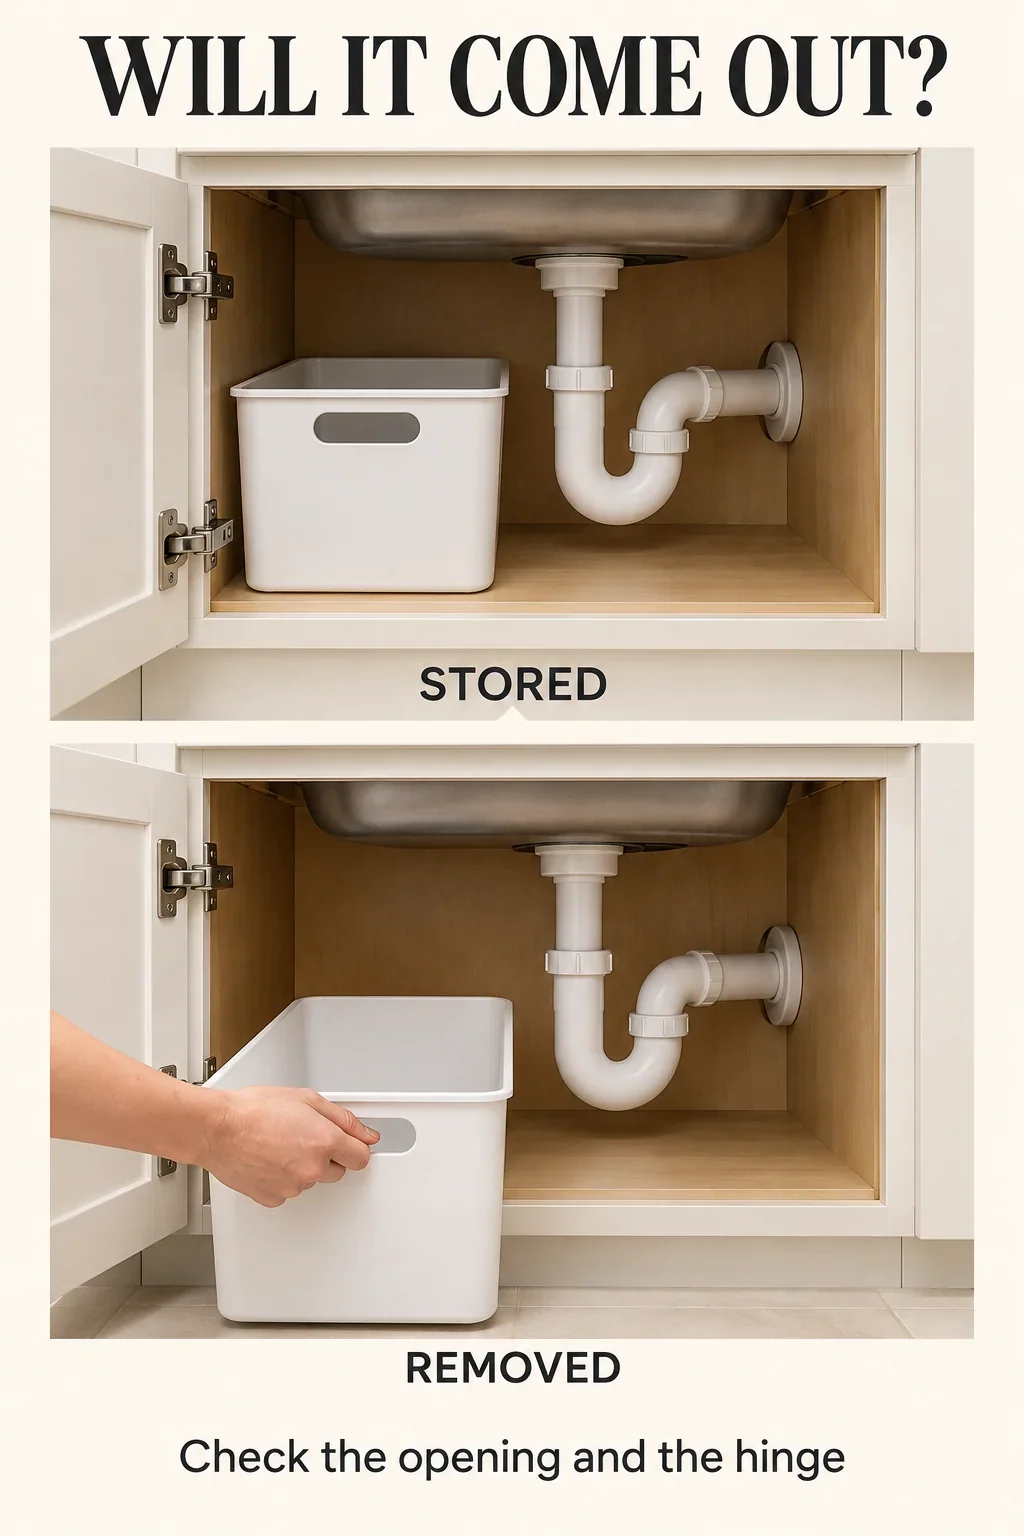
Layout two: an offset disposal changes the useful space
Consider a different cabinet with a disposal occupying the upper left and a clear right pocket measuring 13 inches wide by 18 inches deep by 18 inches high. A small front-left pocket measures 7 by 12 by 10 inches, outside the equipment's required clearance. The usable right door opening is only 11 inches wide because of the hinge and cabinet stile.
A 12-inch-wide pull-out unit looks suitable when compared with the right pocket alone, but it fails the opening test. Its rails and loaded tray cannot travel freely through the 11-inch opening. Choose a removable caddy 9 inches wide by 15 inches deep by 6 inches high instead, with handles and contents staying below 13 inches. Keep label-approved daily bottles upright, and test the full removal route with them inside.
In the small front-left pocket, a 5-by-9-inch tray with a 7-inch loaded height holds dry brushes and a folded pair of gloves. Nothing rests against the disposal, electrical connection or hoses. This is deliberately less storage than the two-bin cabinet: trying to reproduce the first layout would sacrifice access. Bulk refills go to another suitable location, and rarely used tools move out of the daily caddy.
If either pocket in your own cabinet falls within an equipment clearance, leave it empty. These dimensions illustrate a method, not a fit claim for a particular disposal or cabinet. The linen closet organization guide offers a useful way to separate daily supplies from backups elsewhere, though cleaning products still need storage appropriate to their labels.
A door basket adds a moving footprint
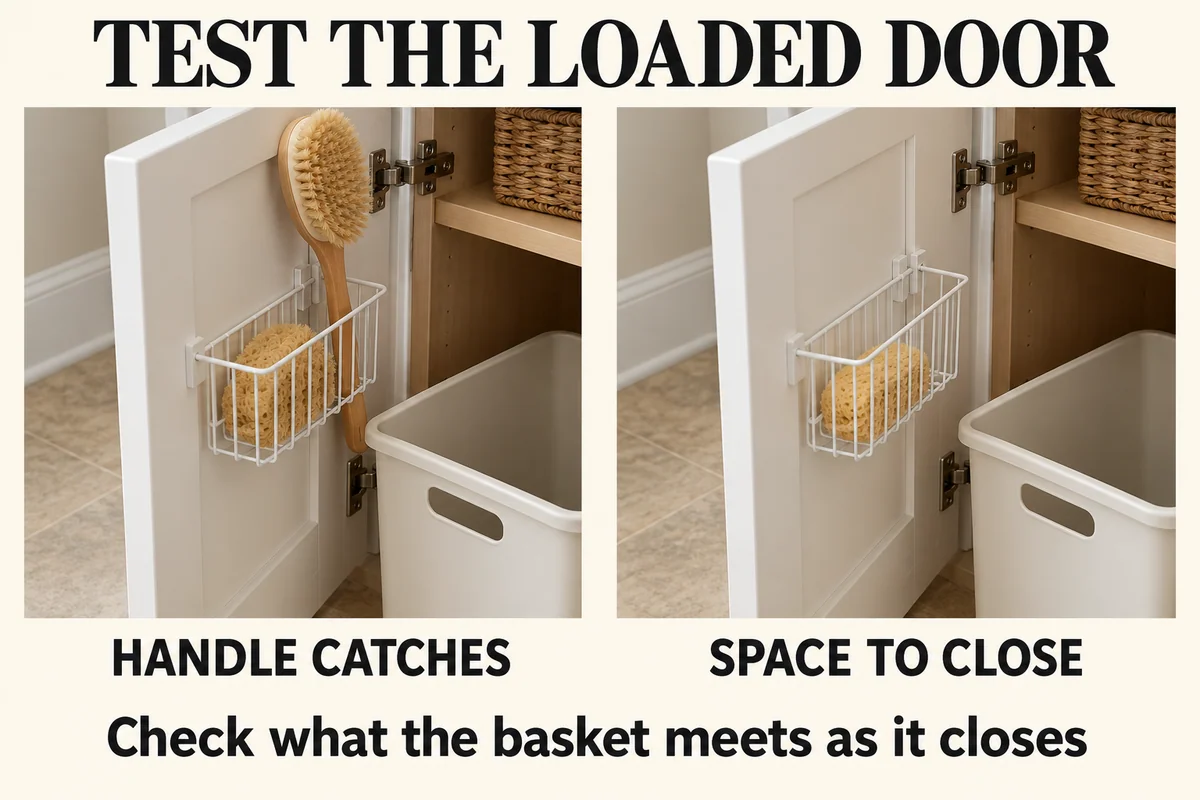
Try a door organizer empty, then with its intended contents. Close the door slowly and watch whether the basket, a brush handle or a bottle meets the floor bin or plumbing. A basket that looks shallow from the front can sweep into a pipe as the hinge turns. If it touches, change its position within the maker's allowed installation options, choose a shallower organizer or leave the door clear.
Follow the organizer's fixing and load instructions. Do not add screws to an unfamiliar door or move plumbing to rescue a poor fit. A small hook for a suitable lightweight tool may be more useful than a basket that prevents the cabinet from closing normally.
Let product labels decide what belongs here
Keep cleaning products in their original containers with labels intact, and follow their storage directions. A neat row of matching decanted bottles removes information you may need. If a product requires conditions this cabinet cannot provide, move it to suitable storage; keep hazardous supplies inaccessible to children and pets. An organizer does not make an unsuitable location suitable.
Let damp cleaning tools dry in an appropriate place before returning them. Dry spare cloths and paper supplies can live elsewhere if moisture is a recurring concern. For everyday dishes or display pieces, the open kitchen shelving guide covers a different storage role; they do not need to compete with plumbing under the sink.
At the next refill, lift out the caddy, check the base and remove anything no longer used. A layout is working when the intended item comes out easily and the cabinet can be inspected without unloading a small warehouse.